
Halloween Pumpkin Sticker in Affinity Designer 2
In this Affinity Designer 2 tutorial, we will create a Halloween digital sticker for Goodnotes. We will start with a 1000 x 1000 pixel document. This will give us a 3.33 inches stamp at 300 dpi. Although we are not going to print our sticker, this is a good size to use. Using a royalty free image of a pumpkin from Pixabay (see link below), we will draw our pumpkin sticker with the drawing tools and add texture with brushes.
Pumpkin Image
https://pixabay.com/photos/autumn-decoration-fall-food-fresh-2905/
Screenshots used by permission of Time Base Technology Limited.
- Open Affinity Designer and start a new file at 1000 x 1000 pixels by 72 dpi (see screenshot). You won't need margins or bleed lines, so turn them off. If you prefer to use Artboards you have that option. Set the Color Format to RGB/8 and check the box for Transparent Background (see screenshot).
- First, we will add a background layer. With the Rectangle tool, draw a square over the entire canvas. In the Context toolbar, set the Fill to white and the Stroke to Null (see screenshot). In the Layers panel, name this layer to BG Color.
- Open your pumpkin image and center the pumpkin over the entire canvas (see screenshot).
- Select the Pen tool. In the Context toolbar, set the Stroke Color to black, the Style to Stroke Line and the Width to 1 to 3 pt (see screenshot).
- With the Pen tool, trace or draw an outline of the stem (see screenshot). In the Layers panel, name this layer to Stem. In the Stroke panel, check the box for Scale with Object (see screenshot).
- Next, do the same for the pumpkin body. Name the layer Pumpkin.
- Still using the Pen tool, trace a few of the groves on the stem.
- Repeat the last step for the body of the pumpkin (see screenshot).
- Select each of the inside lines and apply one of the brushes in the Brushes panel. Do the same for the outside line around the entire pumpkin (see screenshot).
- With the Pumpkin layer active, select the Fill eyedropper from the Context toolbar and grab the orange color for the pumpkin body. If the inside lines disappear, move those layers above the Pumpkin layer in the Layers panel (see screenshot).
- Move the Stem layer to the top of the Layers panel. Now move the curve layers that are the inside lines for the stem above the Stem layer (see screenshot).
- Apply brushes to the stem and stem lines. Set the stem color.
The Scale with Object feature will scale the thickness of the stroke as you scale your image.
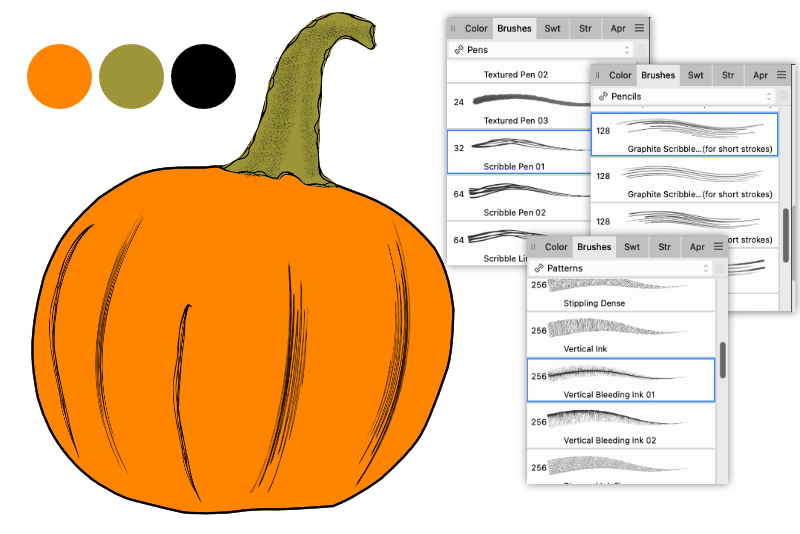
Now the real fun begins. We will use the brushes in the Brushes panel to add texture to these lines. Depending on your style, you will want to use certain brushes. In the example, I used brushes from the Pens, Pencils and Patterns categories. We will start with the pumpkin body (see screenshot).
Pumpkin Image
https://pixabay.com/photos/autumn-decoration-fall-food-fresh-2905/
Screenshots used by permission of Time Base Technology Limited.

Related Articles
Editor's Picks Articles
Top Ten Articles
Previous Features
Site Map
Content copyright © 2023 by Diane Cipollo. All rights reserved.
This content was written by Diane Cipollo. If you wish to use this content in any manner, you need written permission. Contact Diane Cipollo for details.


